Installing an over-the-range microwave can be a simple DIY project that provides space-saving flexibility and convenience in your kitchen. Whether you are replacing your current microwave, remodeling or installing a microwave over the stove for the first time, this step-by-step guide will walk you through the process.
step-by-step instructions
This 12-step process will guide you through everything from mounting microwave brackets and locating wall studs to positioning your appliance above the range. From start to finish, plan for roughly two hours for complete installation. For optimal installation and handling of the appliance, it is recommended to complete this task with two people.
Be mindful that these instructions take into account an existing space over your range with the proper electrical connections and ventilation capabilities in place. In some cases, electrical outlets may need to be added or ductwork may need to be installed for the microwave hood vent to circulate outside. We recommend consulting a professional for these cases.
Remember to always follow the instructions on your installation guide during this process.
Prepare the work area
First, make sure to unplug your range and carefully remove it from the cutout space. Next, place a drop cloth or towel on the floor to help prevent damage and messes.

Locate the studs
Using a stud finder, locate the studs underneath the cabinet space where the microwave will be installed. Next, using a pencil and a level, mark the stud locations and extend these markings downward to form a straight line on the wall.
Locate the mounting plate
In your microwave’s packaging, locate the mounting plate that will be secured to the wall. This unit may be attached to the back of the appliance. If so, carefully detach the bracket and set aside.
Apply template to wall
Your appliance may include two cardboard templates for installing an over-the-range microwave:
- Rear wall template
- Upper cabinet template
Once located, carefully cut the rear wall template with scissors. The upper cabinet template will be used later. Repeat this step.
If cardboard templates are not included, the mounting bracket can be used as the template.
Apply the cardboard template to the wall with masking tape, or hold the mounting bracket still against the wall. Ensure that the template is level and flush against the bottom edge of the upper cabinet.
Make your markings
Using a pencil, mark the drill holes near the bottom corners of the template or bracket. Next, draw a horizontal line on the wall along the bottom edge.
These markings will be used for the installation of the mounting bracket.
Align the mounting plate
If you are using the cardboard template, remove it and align the mounting plate to the bottom drill holes. Make sure this is centered against the wall and flush with the horizontal line drawn at the bottom.
Mark the wall studs
Locate the vertical lines drawn to display the wall studs. Holding the mounting plate in place, mark at least one hole through the mounting plate closest to the wall stud vertical line.
The mounting plate must be attached to at least one stud, but two is preferable for the installation process. If this is not possible, refer to your installation guide for best practices.
Drill
Carefully drill through the end hole markings on each bottom corner and stud locations to create a hole.
Attach mounting plate to wall
Align the mounting bracket to the appropriate holes and secure in place with bolts or lag screws, according to the manufacturer’s installation guide.
Prepare upper cabinet
Remove contents from the upper cabinet. Next, align the upper cabinet cardboard template along the bottom of the cabinet. Ensure the template is centered along the rear wall with the template arrows also against the wall.
Consult the product’s installation guide if a cardboard template is not included.
Drill the power cord hole
Using the template, carefully drill the indicated hole into the bottom of the cabinet for the microwave’s power cord to flow through.
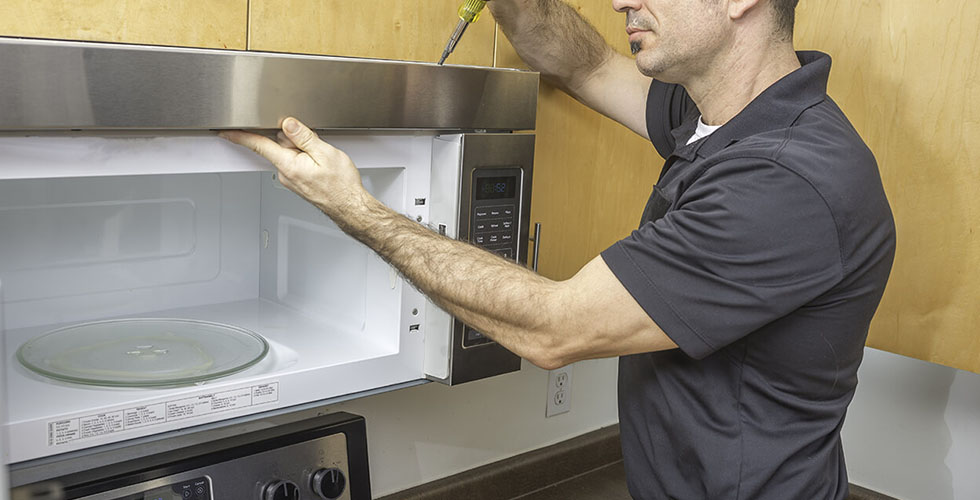
Install the microwave over the stove
Carefully remove any rotating plates or other contents from the inside of the microwave. Tape the door shut.
With a friend:
Position the microwave into the allotted space, tilt the appliance toward you, and run the power cord through the hole into the upper cabinet.
- Rotate the appliance upward and push it against the mounting plate. Hold this position in place.
- With your helper holding the microwave insert the provided bolts through the upper cabinet and into the microwave oven. Secure the appliance and tighten bolts as needed.
- Plug in your microwave and clear the workspace.